English Cottage Project 2015
In 2014, the Cape Town Miniaturia Guild group project for 2015 was announced. Participants could choose a picture from the book, English Cottage Interiors, by Hugh Lander and Peter Rauter.
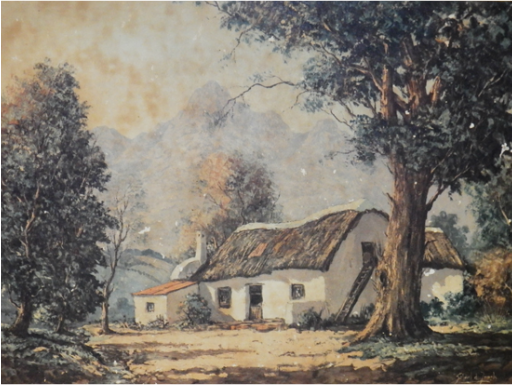
The project was to be completed for the 2015 Annual Guild Fair in September. I couldn’t be there when the pictures were chosen, but I asked for a kitchen scene. They sent me this picture.
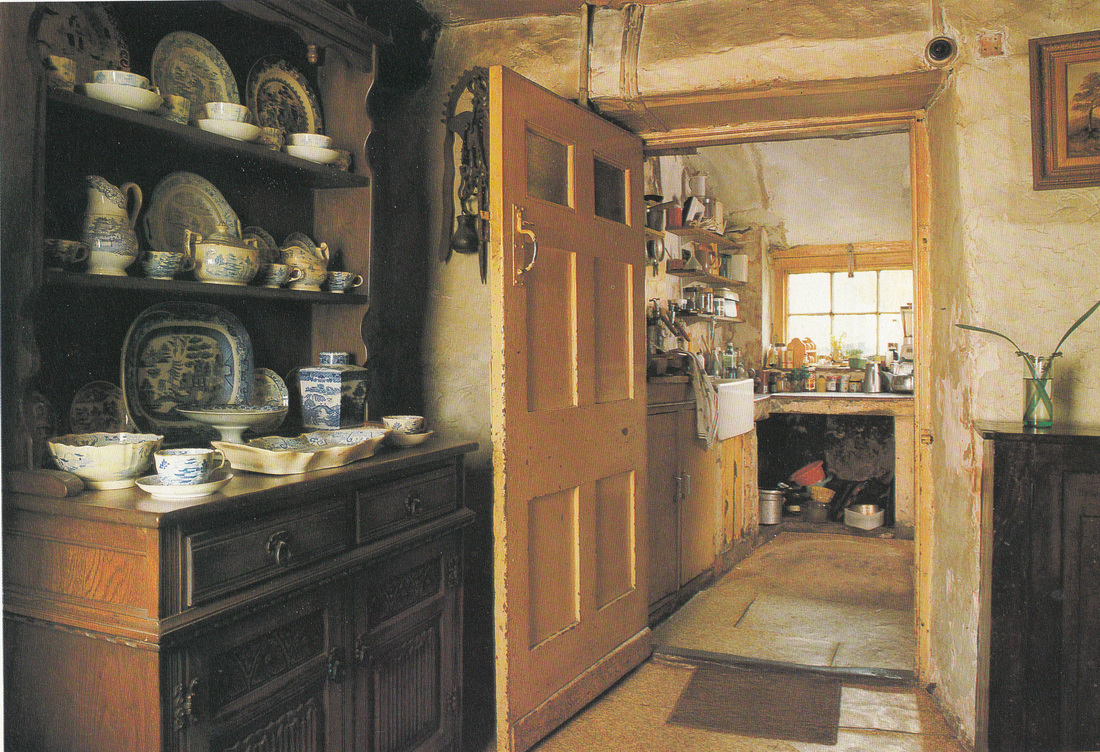
The picture I had to copy.
I already had a hutch similar to the one on the left, as well as a few blue and white china pieces. I also had a roombox with slanted sides, which I could use, so I decided to give it a go. As life goes, I got involved in work and other projects, and never really did anything, apart from cutting the inside walls, and gluing the supports to the roof and floor, for the front wall. So, in June 2015 I was hinging on which one of two projects I should complete for the Fair, and the Cottage won. I only had 3 months left, and not much time to do miniatures.
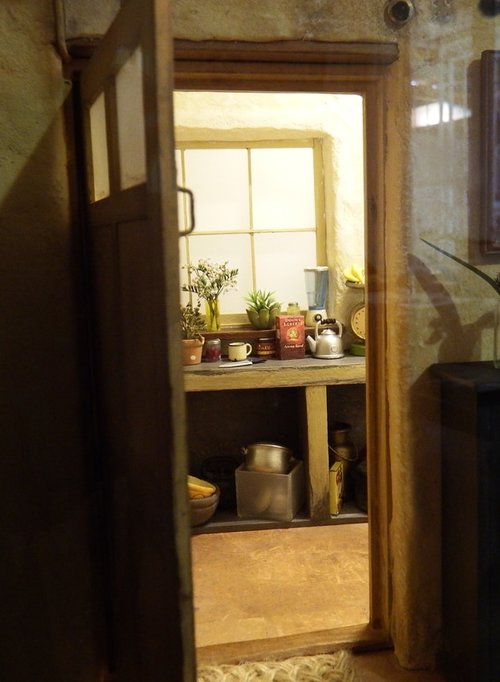
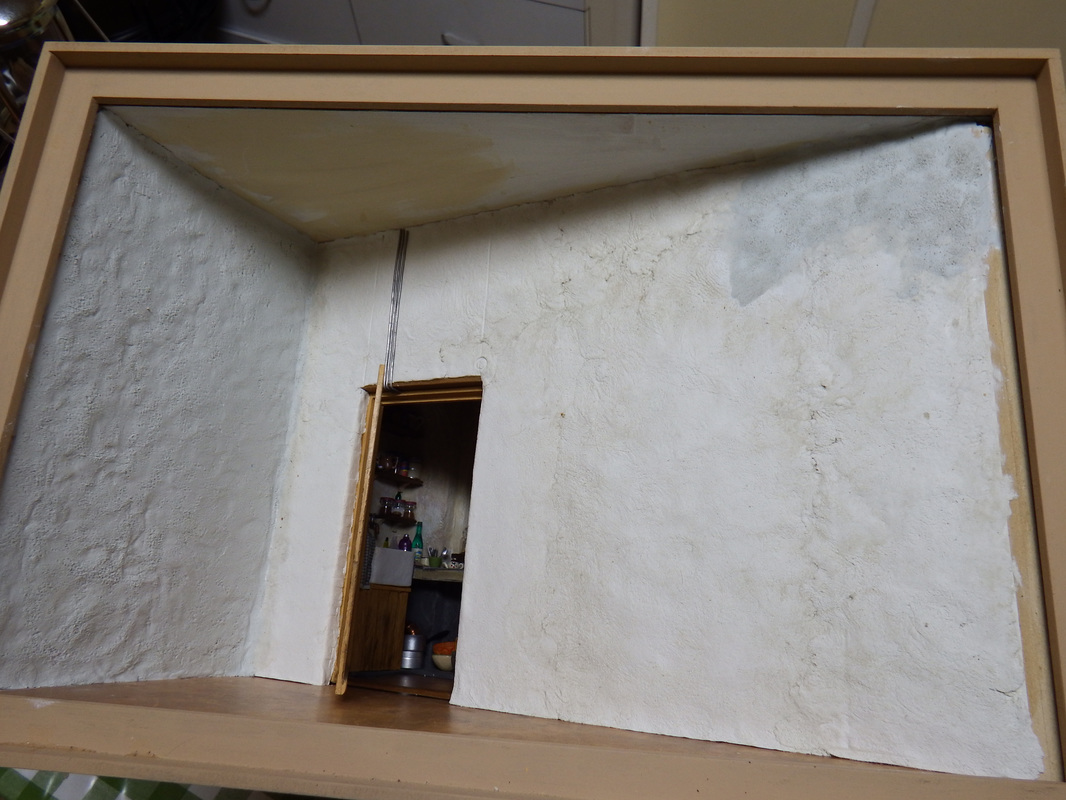
I worked on the back kitchen wall first. It is a false wall, as I needed a light source behind the window. I cut out the window opening, and made a window frame from strip wood. I painted the frame with Americana Antique White. On the picture, there is white light streaming through the window. I sprayed a piece of 1mm thick Plexi-Glass with Rust-Oleum Frosted Glass (on both sides), and glued that to the back of the window frame. Before I glued in the back wall of the kitchen, I painted the back wall of the roombox white, to reflect the light. I also cut openings into the top of the box, as I needed access for the lights, and to replace lights in future, if necessary.
I worked on the back kitchen wall first. It is a false wall, as I needed a light source behind the window. I cut out the window opening, and made a window frame from strip wood. I painted the frame with Americana Antique White. On the picture, there is white light streaming through the window. I sprayed a piece of 1mm thick Plexi-Glass with Rust-Oleum Frosted Glass (on both sides), and glued that to the back of the window frame. Before I glued in the back wall of the kitchen, I painted the back wall of the roombox white, to reflect the light. I also cut openings into the top of the box, as I needed access for the lights, and to replace lights in future, if necessary.
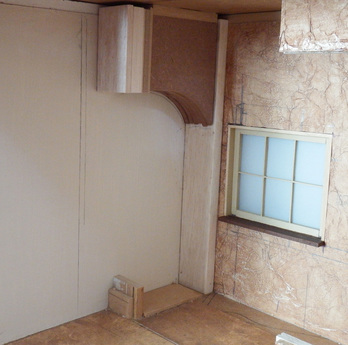
Constructing the arch.
I cut the basic shape of the arch to the left, and the pillar in the corner, from wood, and glued it in. Next step was to do the textured wall. I decided to use white Das air-dry clay, as that is what I had available.
See Tutorials: Using Das air-dry clay on walls.
I had to do the whole back part of the roombox first, including all accessories. Everything had to be glued in for ever and ever, as there was no way to get in there, once the front wall was in place. I usually make my own roomboxes, which often include a hinged roof, or some other way to get to background scenes and lighting. In this case, I had to work with what I had. I realised that making the little bits and bobs that occupy the very crowded scene, would take the longest time. So in the meantime I went through my stash, to determine what I still need to make. A perfect opportunity to use not so perfect, a little out of scale miniatures!
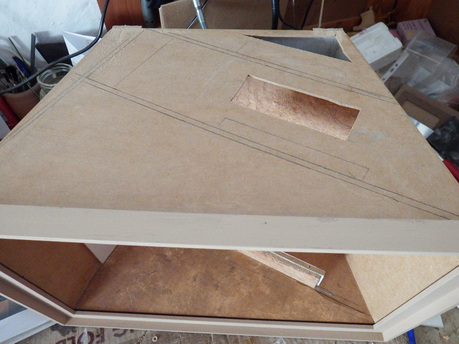
Holes cut into the roof of the box. The pencil lines indicate where the walls inside the box are situated.
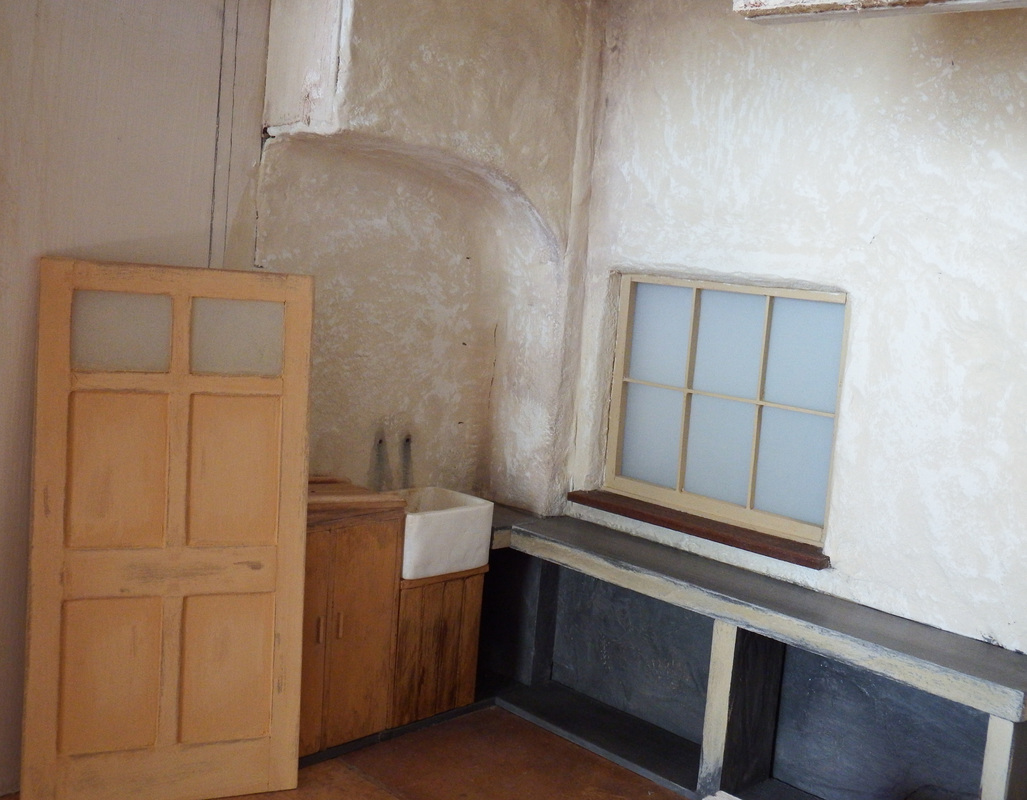
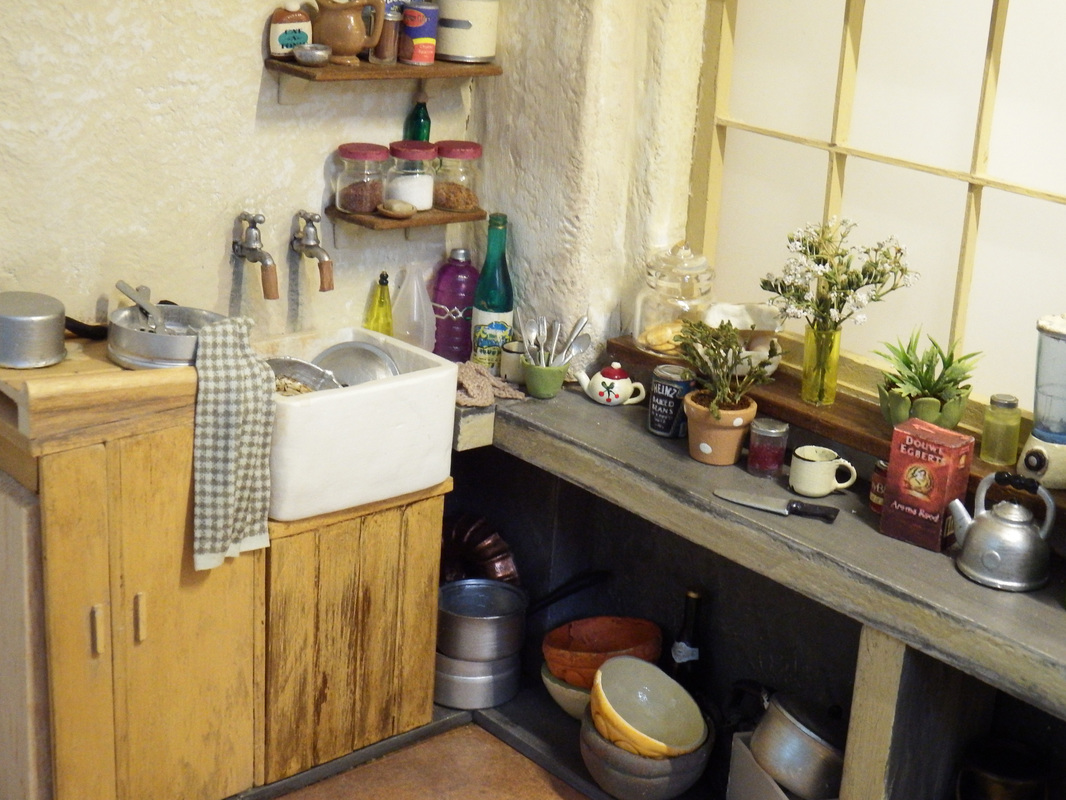
I made the kitchen sink from white Fimo. I made the kitchen cabinets and window sill from Walnut. The "cement" work surfaces are made from Supawood, and painted with Annie Sloan chalk paint (ASCP), Graphite and Old Ochre. I used Annie Sloan soft wax for the work surfaces. The walls were painted with ASCP Old White, and Old Ochre, and then sanded down a bit for a worn look. I painted the cabinet doors and base if the sink with ASCP Arles, and distressed it by sanding it.
I made the floor from scrapbooking paper, and waxed it. It resembles the linoleum floor in the picture.
I made the floor from scrapbooking paper, and waxed it. It resembles the linoleum floor in the picture.
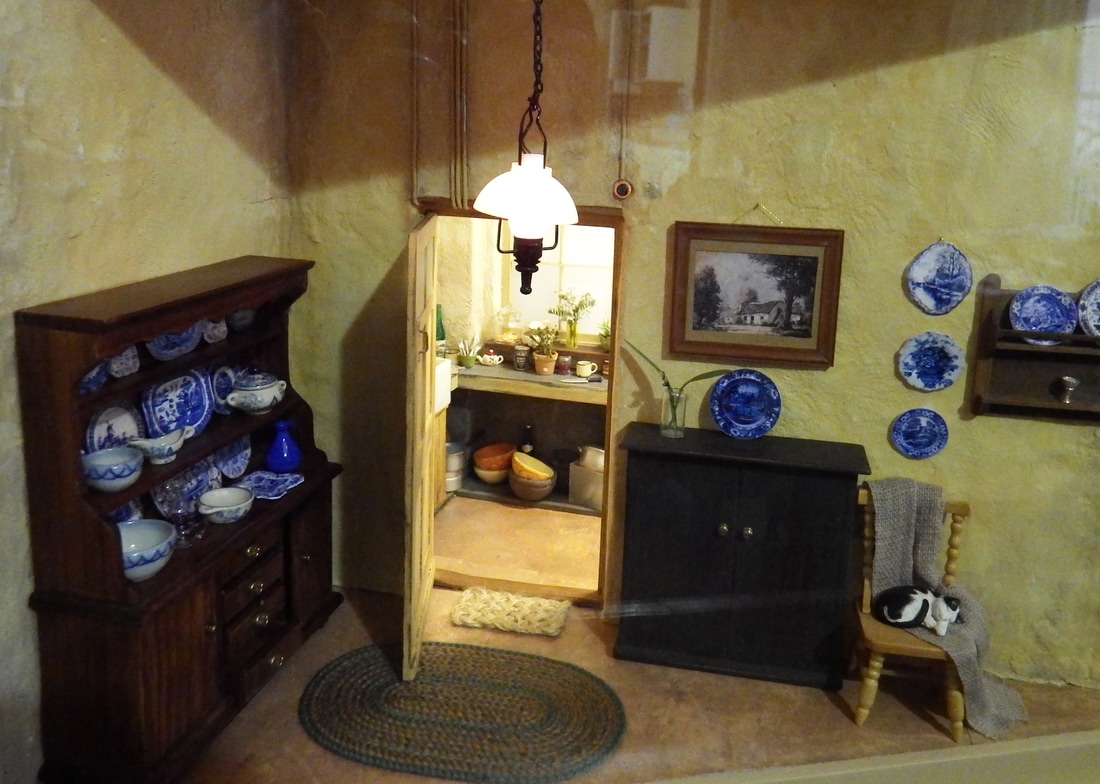
Kitchen ready to move in.
I made the door from Walnut, and also added 2 Perspex windows, that I sprayed with Rust-Oleum Frosted Glass. The door was painted with Arles, and sanded to show the dark wood underneath. The door was waxed with AS clear wax, and also some dark wax in places.
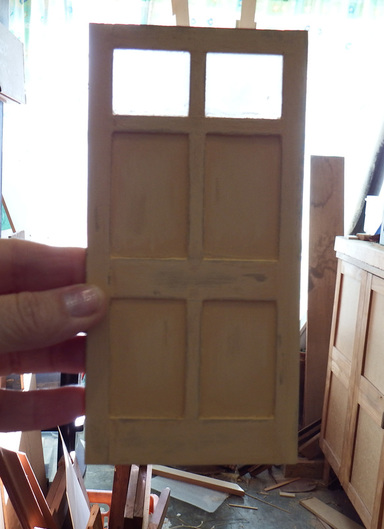
The door.
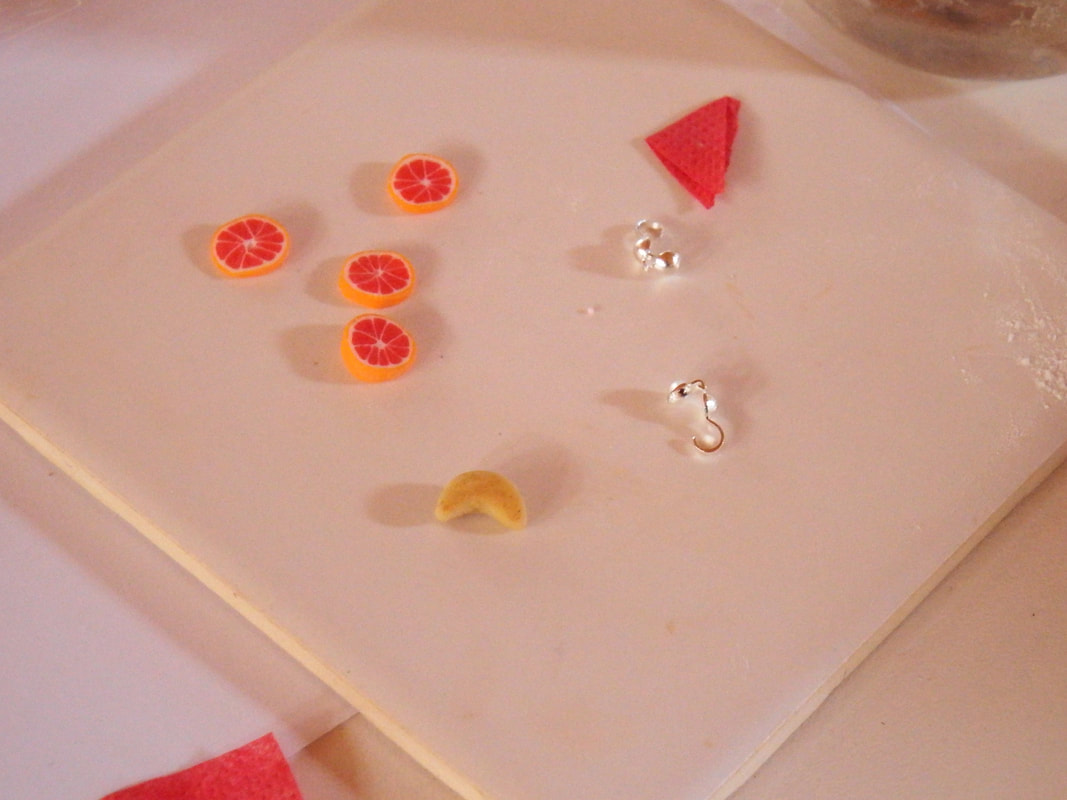
I made a door surround, pin hinged the door, and glued it into the front wall aperture. But first I had to complete the kitchen part of the box. Amazing how many little things you need for a scene like this. It was never enough. I used a few out-of-scale-but-cute leftovers from my beginner days. I'm sentimental, I can't get rid of stuff! I made containers by cutting up pen casings, and covering pieces of dowel with paper. I filled cheap glass bottles with sand-art coloured sand to resemble coffee, sugar, etc. The rest was made using printies, dried plant material and even a plastic eye drop container.
I made Walnut shelves for the area above the sink, and filled it with my goodies.
I made Walnut shelves for the area above the sink, and filled it with my goodies.

Now I was ready to attach the front wall of the roombox. I glued it to the supports inside the box. Now my chopped-off kitchen cabinets make sense, doesn't it?
Next I did the wall surface with air-dry clay, and left it to dry.
Next I did the wall surface with air-dry clay, and left it to dry.
Once dry, I painted the wall with diluted ASCP Arles, and aged it with diluted ASCP Coco. I made the electrical tubes above the door, with solder wire. It is thick, and bends easily. I painted and aged it too. For some reason, this the my most favourite part of the whole project!
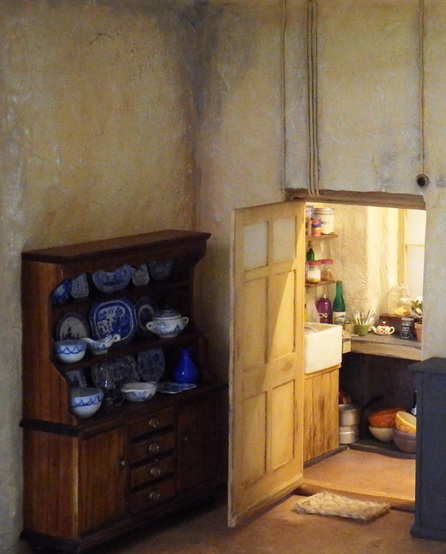
I made a little cabinet to go against the wall, to the right of the door. I used 3mm Supawood (MDF) to make the cabinet. Just a quick little project to fill a gap! At first I tried a faux-painted wood finish with oil paint, but it didn't look right. I painted it with ASCP Graphite, sanded it down, and sealed it with clear wax.
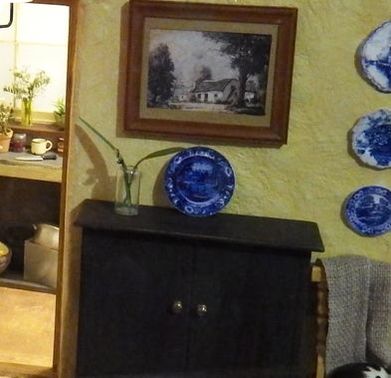
I needed a picture against the wall. I saw a tree in the picture, and it reminded me of a print my parents had in our home, back when I was little. I rediscovered it in my dad's garage after he passed away, and I actually kept it for the frame. Now I could use it in a scene, which is special. (Did I mention that I'm sentimental?). I took a picture of the print, and scaled it down in Photoshop. Made a quick frame, and up it went.
I needed a picture against the wall. I saw a tree in the picture, and it reminded me of a print my parents had in our home, back when I was little. I rediscovered it in my dad's garage after he passed away, and I actually kept it for the frame. Now I could use it in a scene, which is special. (Did I mention that I'm sentimental?). I took a picture of the print, and scaled it down in Photoshop. Made a quick frame, and up it went.
Next was the vase on the cabinet. I couldn't find one with straight sides, like the one on the picture that I had to copy. I took a cheap glass bottle from a craft shop, filed around the neck, and snapped it off. Not perfect, but it looked fine to me. I made 2 leaves with fine wire and masking tape.
I had some blue and white china, but most of the plates I made by taking pictures of blue en white plates, scaling it down in Photoshop, and printing it out on mat photo paper. I used a tutorial I found online, by Christine of Hollyhock Cottage:
http://postwarthatchedcottage.blogspot.co.za/2011_02_01_archive.html
I made the throw on the chair by unraveling a face cloth (see Tutorial in the Menu). The braided rug I made many years ago with embroidery wool.
I finished the project in time for the 2015 Cape Town Miniatures Fair, the visitors voted, and my roombox took second place. It was a huge surprise, as I was up against stiff competition. Lots of gorgeous scenes!
I must apologize for the quality of some of the pictures. It was taken through the glass cover, which I can't move! It was a ready made roombox that I bought, and the glass cover slides in from the side. Well, its supposed to slide. It's stuck!! I will take better pictures if and when I ever get it out.
