Knitted Blankets
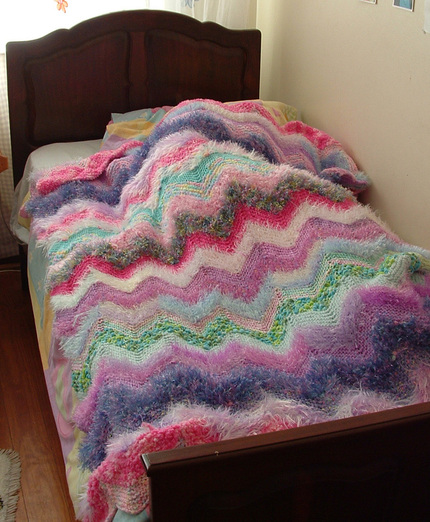
I hate knitting, I really do. I find it really boring. But, a few years ago I really got into it, and knitted 3 blankets. One for myself, and one each for my 2 kids. This I really loved, as its not the same over and over again. By using different colours and textures, you keep pushing yourself to see the final result.
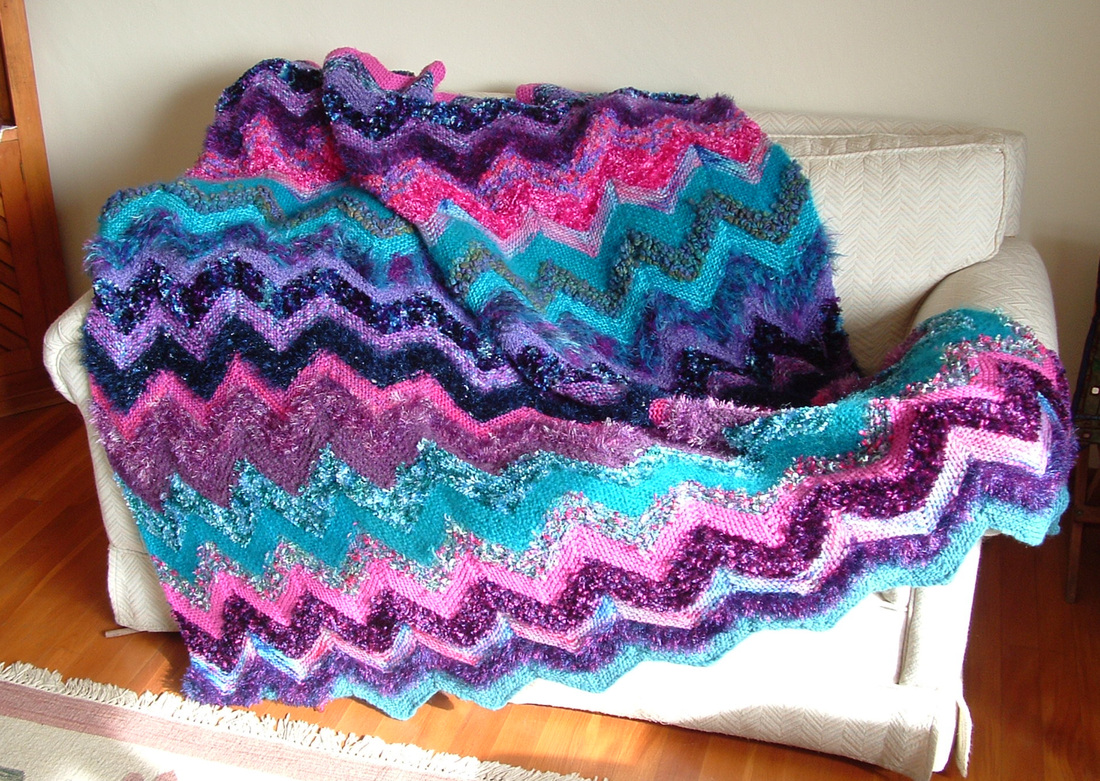
The blanket is constructed of multicoloured strips that you sew together to form a zig-zag pattern. One strip looks like this:
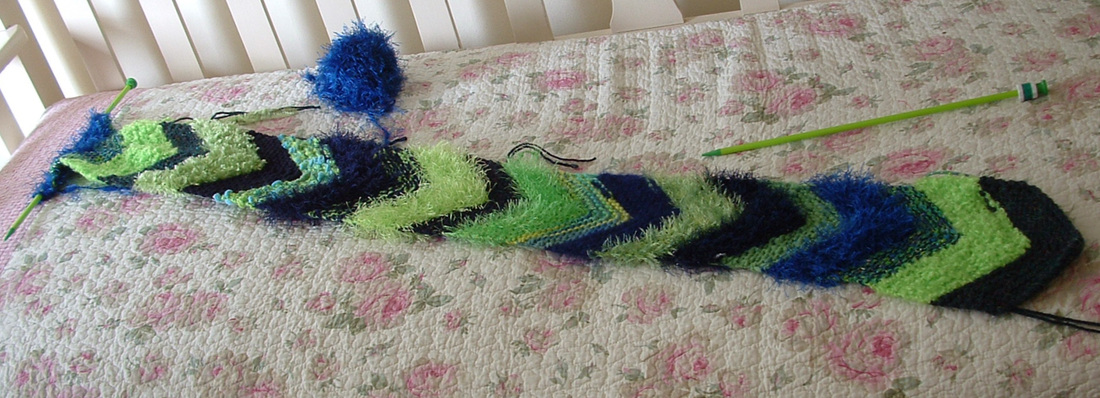
Once you have a few strips, you sew them together like this:
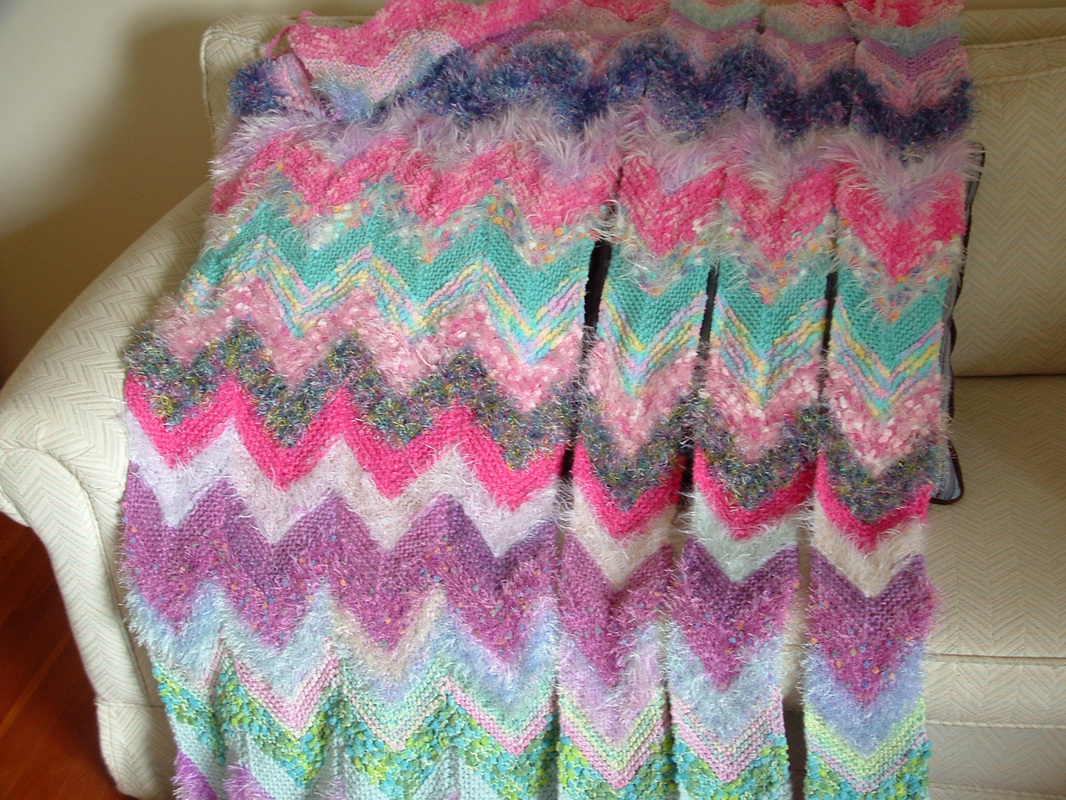
You can of course knit a few strips at the same time, by using a circular needle, but I find that the seams between the strips help to stabilise the blanket.
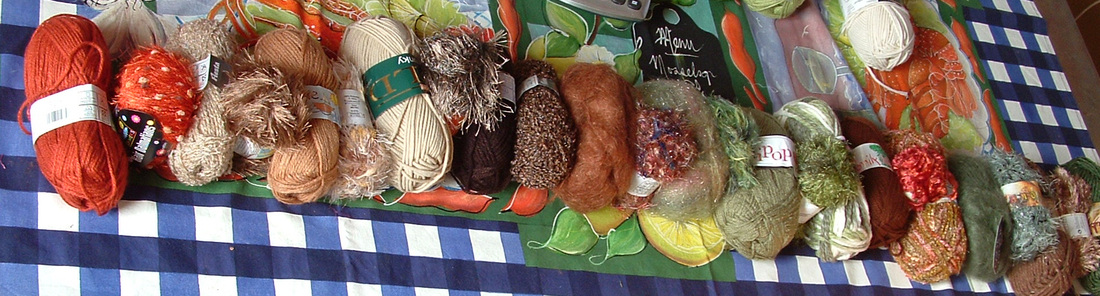
If you want to knit a blanket, you must decide on a colour sceme. Line up your yarns on a plain background, not the busy one I have here! Forget about the type or thickness of yarn, for now only the colour and texture is important. I have made my blankets with about 28 V's per strip, but you can adjust the length to suit you. Of course you don't need 28 different yarns, you can repeat all or some of the yarns.
Try to alternate light and dark, textured and smooth, multicoloured and plain. Sometimes a multicoloured yarn can give you an idea of what colours will work together.
You may be worried about the different thicknesses of the yarns. You knit with 7mm knitting needles. Chunkey yarns you use as is. Double knit yarns and thinner, I used 2 strands together. Eyelash yarns give a nice texture, but it can be a bit slippery, so I always combine it with a matching thinner yarn, just to stabilise it.
I have used expensive handspun wool and much cheaper chainstore yarn in the same blanket, with great success. Its been washed, and is still looking great. If you are worried about washing it, put the blanket in a duvet cover, secure the opening, and wash with cold water on the knit cycle of your washing machine. Dry flat.
The pattern:
Cast on 27 stitches, on 7 mm knitting needles.
You knit each row exactly the same.
*In the first stitch, make one stitch by knitting into the front and back of the stitch.
Knit 12 , then knit 2 together. Knit to end of row.*
And that is the pattern! Knit 10 rows of one colour, and then change to the next colour. I have knitted the "tails" of the first colour into the first few stitches of the second colour. Its not really visible, as I worked with textured yarns.
Carry on with that, 10 rows of each yarn, until you reach the desired length.
To cover the top of a double bed, you will need 12 strips, and less for a single bed.
You will notice that not all the colours are the same size, even though they are all 10 rows long, and that some sections are wider that the others, giving it a wavy look. That is due to the different thicknesses of the yarns. It will all come together in the end, trust me! The sides will even out once you start sewing them together.
Remember to concentrate on which colour to start with next, especially if you are done with the first strip. You don't want to discover you've skipped a colour way down on your strip. I used to tape my samples to a piece of stiff card, so that I could see what to use next.
Sew your strips together on the wrong side of the blanket, and enjoy!
