Part 2.
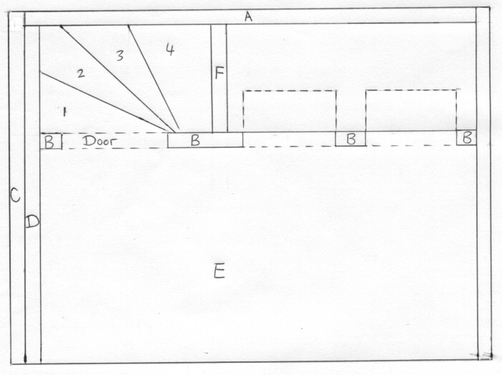
Fig.5 - Placement of walls.
• Glue the left side wall (C) on top of the floor (E), flush with the side.
• Glue back wall (A) to (C) and (E), also on top of the floor.
• Place wall with wide arch (D) on top of wall (C), and trace the opening with a sharp pencil onto side wall C.
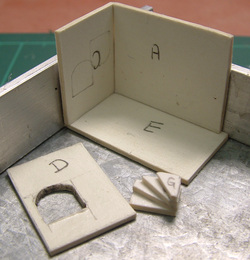
Fig.6 - Wall C with traced opening.
• While the stones on wall C are still wet, cover the inside edges of the arch in wall D with the Polyfilla mixture, smooth the edges, and glue wall D to wall C. Apply pressure to ensure a good bond.
• Also make the stones on the stairs, and leave to dry.
• Also make the stones on the stairs, and leave to dry.
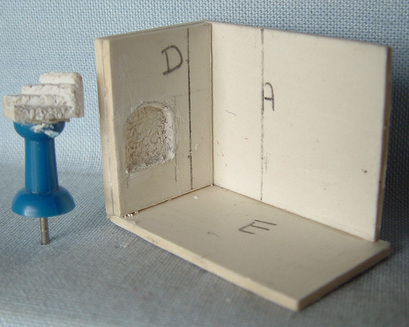
Fig.7 - Stones inside arch, and on staircase.
• Glue the stairs into the left back corner. Press into the corner to make sure that its not taking up more space than its supposed to. The space allowed between wall B and the back wall A, is 5mm, nothing more. Trim the stairs if you need to.
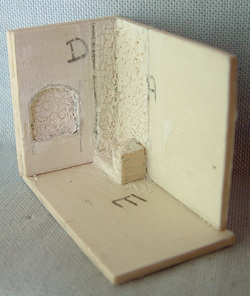
Fig.8 - Stones against staircase wall.
• Do the stones against the staircase wall, as indicated in Fig. 9. You will have to complete this wall now, as you will not have access once wall B is glued in.
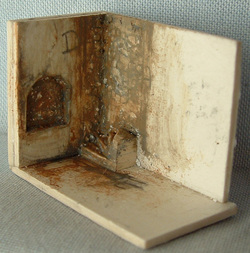
Fig.9 - How NOT to do stones! (Done with wood filler).
• Glue wall F into place, to the right of the stairs.
• On the floor to the right of wall F, glue 5mm wide strip of 3mm thick foamcore or card, to support wall B once its glued in.
• On the floor to the right of wall F, glue 5mm wide strip of 3mm thick foamcore or card, to support wall B once its glued in.
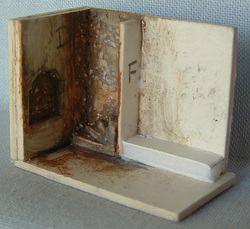
Fig.10 - Wall supports for wall B.
• Paint the right side of the back wall dark brown. This is to act as a background for the wine racks in the arches.
• Slice a 2mm strip of Paperwood, cut to size, and glue 2 shelves into the wide arch on the left wall.
• Slice a 2mm strip of Paperwood, cut to size, and glue 2 shelves into the wide arch on the left wall.
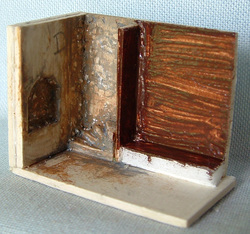
Fig.11 - Dark background for the wine shelves.
• Do the stones on wall B, but don’t glue it in yet. Remember to also cover the inside edges of the arches, and smooth it before the mixture dries. Don’t do the grey colour wash yet.
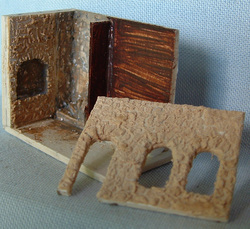
Fig.12 - Stones on wall B, and side wall C.
• Dry fit to mark where wall B will attach to the side wall, and do the stone finish to the left of that line. Clear the area to the right of the arch on the side wall, where the side edge of wall B will be attached later.
